In this tutorial, I will show you how to use the HMC5883L that not really an HMC5883L compass sensor with Arduino. for more specific I will share my experience with you on how to use the QMC5883L compass sensor.

So If you already use the library from HMC5883L and didn’t get the data or the data always 0 from the sensor. And also when the address said it was 0x0D. maybe you got the QMC5883L sensor even it was labeled HMC5883L sensor.
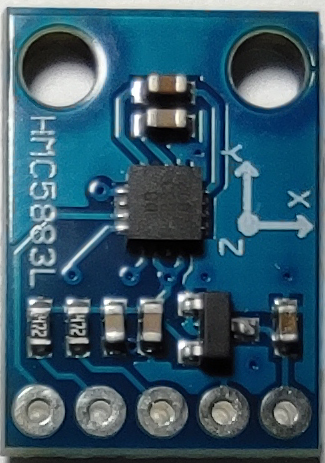
Wiring Diagram for HMC5883L that actually QMC5883L
So just like another I2C sensor, you need to connect VCC and GND to Arduino power. and SDA to A4 and SCL to A5.

Library
This is the most important part, if you already use this sensor using the HMC5883 library and doesn’t work. maybe you just got 0 value. and when you scan the address, it read as 0x0D. there is a huge possibility that your sensor is QMC5883L labeled as HMC5883L.
So the QMC5883L compass sensor should use this library.
QMC5883L compass sensor library
Download the library above and add it to your Arduino library. You can add the library by copy and extract the files in your Arduino library folder. then you can open the example file from the library named QMC5883L_compass.
Code
This is what the example code looks like.
/*!
 * @file QMC5883_compass.cpp
 * @brief The program shows how to realize the function compass.When the program runs, please spin QMC5883 freely to accomplish calibration.
 * @n 3-Axis Digital Compass IC
 *
 * @copyright	[DFRobot](http://www.dfrobot.com), 2017
 * @copyright	GNU Lesser General Public License
 *
 * @author [dexian.huang](952838602@qq.com)
 * @version  V1.0
 * @date  2017-7-3
 */

#include <Wire.h>
#include <DFRobot_QMC5883.h>

DFRobot_QMC5883 compass;

void setup()
{
  Serial.begin(115200);
  while (!compass.begin())
  {
    Serial.println("Could not find a valid QMC5883 sensor, check wiring!");
    delay(500);
  }

    if(compass.isHMC()){
        Serial.println("Initialize HMC5883");
        compass.setRange(HMC5883L_RANGE_1_3GA);
        compass.setMeasurementMode(HMC5883L_CONTINOUS);
        compass.setDataRate(HMC5883L_DATARATE_15HZ);
        compass.setSamples(HMC5883L_SAMPLES_8);
    }
   else if(compass.isQMC()){
        Serial.println("Initialize QMC5883");
        compass.setRange(QMC5883_RANGE_2GA);
        compass.setMeasurementMode(QMC5883_CONTINOUS);
        compass.setDataRate(QMC5883_DATARATE_50HZ);
        compass.setSamples(QMC5883_SAMPLES_8);
   }
  }
void loop()
{
  Vector norm = compass.readNormalize();

  // Calculate heading
  float heading = atan2(norm.YAxis, norm.XAxis);

  // Set declination angle on your location and fix heading
  // You can find your declination on: http://magnetic-declination.com/
  // (+) Positive or (-) for negative
  // For Bytom / Poland declination angle is 4'26E (positive)
  // Formula: (deg + (min / 60.0)) / (180 / M_PI);
  float declinationAngle = (4.0 + (26.0 / 60.0)) / (180 / PI);
  heading += declinationAngle;

  // Correct for heading < 0deg and heading > 360deg
  if (heading < 0){
    heading += 2 * PI;
  }

  if (heading > 2 * PI){
    heading -= 2 * PI;
  }

  // Convert to degrees
  float headingDegrees = heading * 180/M_PI;

  // Output
  Serial.print(" Heading = ");
  Serial.print(heading);
  Serial.print(" Degress = ");
  Serial.print(headingDegrees);
  Serial.println();

  delay(100);
}
Just Upload the code, and now you should see the result on serial monitor.
The Result
Open the serial monitor and now you should see the value of compass.

